Downloading files using Python can be useful for various purposes, depending on your specific needs.
For example, you may need to download a file from a URL for,
- Web scraping,
- Accessing datasets or files from online repositories,
- Retrieving backup or log files from a server, or just
- Retrieving content in the form of images, videos, or audio files.
But how do you do in your Python code:
How to download a file from URL in Python
To download files in Python, you can use various libraries, such as requests, urllib, or wget, depending on your specific use case and preferences.
These libraries provide convenient functions to send HTTP requests and manage file downloads efficiently.
Let’s look at each of them and see how you can download files from a given URL.
Before we begin, make sure you have Python installed on your system.
If not, head to the official Python website (www.python.org) and download the latest version for your operating system.
Download file from a URL using the requests library
Python makes it easy to work with web data, and the requests library is one of the most popular choices for HTTP requests and file downloads.
Follow these steps to download a file using the requests library in Python:
- Install requests library
- Import the requests library in your Python code
- Download a file from a URL
- Handle exceptions associated with HTTP requests
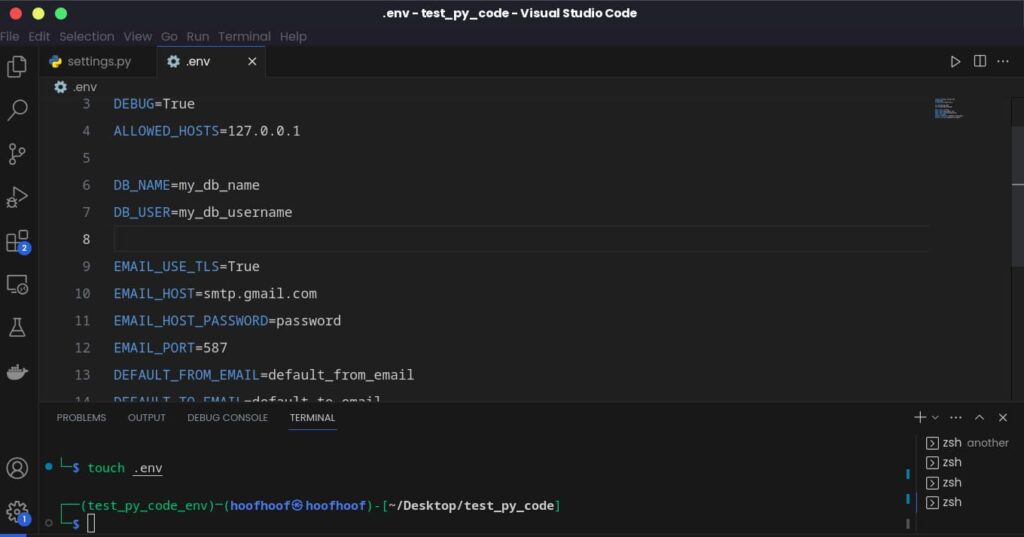
Step 1: Install requests library
To use the requests library, install it first. To install the requests library, open your terminal or command prompt, and enter the following command:
pip3 install requests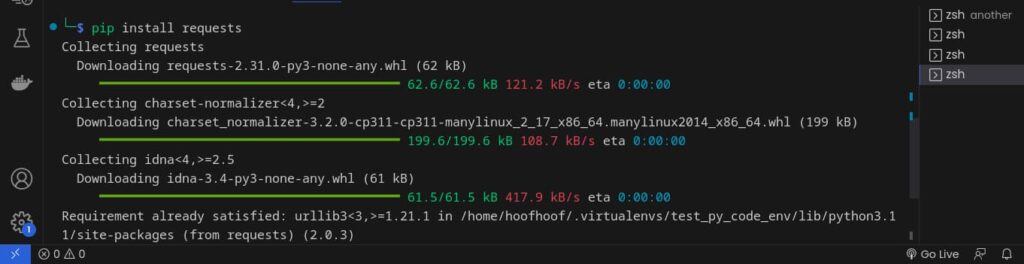
Step 2: Importing requests library into your code
Once the requests library is installed, we need to import it into our Python script to use its functionality.
We typically use the import statement at the beginning of our script:
import requestsStep 3: Downloading a file from a URL using requests
Now that we have the requests library ready and configured for our Python app, let’s download an actual file from a URL.
The requests library provides a straightforward method called get() to send an HTTP GET request to the server and retrieve the content of the URL.
Here’s a simple example of how to download an image file from a URL:
import requests

import requests

url = "https://www.learningcontainer.com/wp-content/uploads/2020/07/Sample-JPEG-Image-File-Download-scaled.jpg"
response = requests.get(url)

if response.status_code == 200:
    with open("image.jpg", "wb") as file:
        file.write(response.content)
        print("File downloaded successfully!")
else:
    print(f"Failed to download the file. Status Code: {response.status_code}")
And voila!
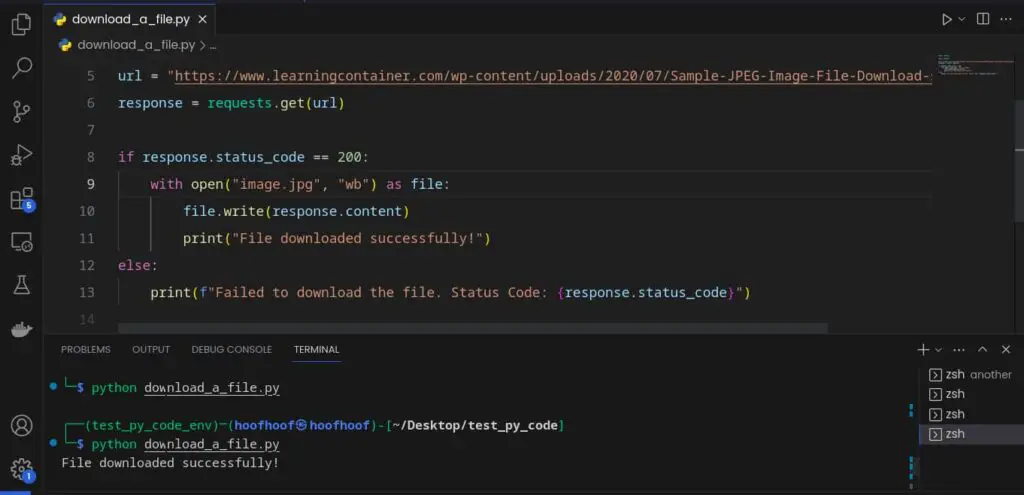
If you look in your current working directory, you should see the image file saved alongside your .py file.
In this example, we send a GET request to the URL using requests.get(), and if the request is successful (status code 200), we save the file content as “image.jpg” in binary mode (“wb”).
Here’s how the requests library downloads the image file and saves it in your working directory:
requests.get(url): Therequests.get()function is part of therequestslibrary in Python. It allows us to send an HTTP GET request to a specified URL. In our example, we use this function to send a request to the URL.- Status Code (200): When we make an HTTP request, the server responds with a status code that indicates the success or failure of the request. A status code of 200 means “OK” and indicates that the request was successful. In other words, the server was able to fulfill the request, and the data we want to download is available.
response: Therequests.get()function returns aResponseobject, which contains the server’s response to our request. We store this response in the variableresponse.if response.status_code == 200:: In Python, we use anifstatement to check whether a condition is true or false. In our case, we check if the status code in theresponseobject is equal to 200 (i.e., the request was successful).with open("image.jpg", "wb") as file:: This line of code opens a new file named “image.jpg” in binary mode (“wb”). Binary mode is essential when dealing with non-text files, such as images, to ensure that the file is written correctly without any character encoding issues.file.write(response.content): Inside thewithblock, we use thewrite()method of the file object to save the content of the response to the “image.jpg” file. Theresponse.contentattribute contains the raw content of the file obtained from the URL.print("File downloaded successfully!"): Finally, if the file download is successful (status code 200), we print a message indicating that the file has been downloaded successfully.
Step 4: Handling errors
When downloading files, it’s essential to handle potential errors gracefully.
For instance, the server might respond with a status code other than 200 (OK).
To address this, we can use a try–except block to handle exceptions like this:
import requests

url = "https://www.learningcontainer.com/wp-content/uploads/2020/07/Sample-JPEG-Image-File-Download-scaled.jpg"

try:
    response = requests.get(url)
    response.raise_for_status()  # Raises an exception for bad status codes

    if response.status_code == 200:
        with open("image3.jpg", "wb") as file:
            file.write(response.content)
            print("File downloaded successfully!")
    else:
        print(f"Failed to download the file. Status Code: {response.status_code}")

except requests.exceptions.RequestException as e:
    print(f"An error occurred: {e}")
Step 5: Handling large files and tracking the progress of your download files
When dealing with large files, it’s useful to track the download progress.
The requests library provides a neat way to do this using iter_content().
For our image download code example, we can adjust it to show the progress of the image file like this:
import requests

url = "https://www.learningcontainer.com/wp-content/uploads/2020/07/Sample-JPEG-Image-File-Download-scaled.jpg"

try:
    response = requests.get(url, stream=True)
    response.raise_for_status()  # Raises an exception for bad status codes

    if response.status_code == 200:
        total_size = int(response.headers.get("content-length", 0))
        block_size = 1024  # 1 KB

        with open("image.jpg", "wb") as file:
            for data in response.iter_content(block_size):
                file.write(data)
                downloaded_size = file.tell()
                print(f"Downloaded: {downloaded_size}/{total_size} bytes", end="\r")

        print("\nFile downloaded successfully!")

    else:
        print(f"Failed to download the file. Status Code: {response.status_code}")

except requests.exceptions.RequestException as e:
    print(f"An error occurred: {e}")
In this updated version, we made the following changes:
stream=True: When sending the request, we set thestreamparameter toTrue. This tells therequestslibrary to retrieve the response in streaming mode, which is suitable for handling large files.total_size: We retrieve the total file size from the HTTP response headers usingresponse.headers.get("content-length", 0). This allows us to know the total size of the file before downloading it.- Progress Tracking: Inside the
withblock, we use aforloop to iterate over the content received in chunks (block_sizebytes at a time) usingresponse.iter_content(). We write each chunk to the file and track the downloaded file size usingfile.tell(). - Printing Progress: We use
print()with theend="\r"parameter to overwrite the previous progress output in the console, making the progress tracking appear on the same line. print("\nFile downloaded successfully!"): After the file download is complete, we print a new line to move to the next line in the console and display a success message.
With these additions, the code can now handle the download of large files while providing real-time progress tracking for the user.
The requests library is one of the most efficient methods of downloading and saving files using Python.
However, you can still use other libraries such as urlib and wget.
How to download a file from a URL using urllib
To begin, ensure you have Python installed on your system.
Python comes with the urllib module by default, so there’s no need for additional installations.
To use the library, you’ll need to import it into your Python script:
import urllib.request
Next, download the file
With the urllib module imported, you can now proceed to download the file from the URL.
The process involves two primary steps: sending a request to the server and saving the file locally.
Here’s a code snippet to download a zip file from a URL:
import urllib.request

url = "https://www.learningcontainer.com/wp-content/uploads/2020/05/sample-zip-file.zip"

file_name = "large-file.zip"
try:
    opener = urllib.request.build_opener()
    opener.addheaders = [('User-Agent', 'Mozilla/5.0')]
    urllib.request.install_opener(opener)
    urllib.request.urlretrieve(url, file_name)
    print("File downloaded successfully!")
except urllib.error.URLError as e:
    print(f"Failed to download the file. Error: {e}")
This example also includes setting a custom User-Agent to simulate a web browser and handle certain scenarios like the 403 Forbidden error.
Here’s how it works:
- The first line of the code imports the
urllib.requestmodule, which allows us to send HTTP requests and handle URL-related operations in Python. - Next, we define the URL of the file we want to download and a desired file name for the downloaded file. In this example, the URL points to a sample ZIP file. We specify the
file_nameas “large-file.zip”, indicating the name under which we want to save the downloaded file on our local machine. - To initiate the download, we use the
urlretrieve()function from theurllib.requestmodule. This function takes two arguments: the URL from which we want to download the file (url) and the desired file name (file_name) under which we want to save it on our local machine. - Some servers require a valid User-Agent header in the HTTP request to allow access to the resource. To handle this scenario, we simulate a web browser’s User-Agent by setting a custom header. We create an opener with
urllib.request.build_opener()and add the User-Agent header with the value “Mozilla/5.0”. The User-Agent header indicates that the request is coming from Mozilla Firefox version 5.0. - After setting the custom User-Agent, we install the opener with
urllib.request.install_opener(opener). This ensures that any subsequent HTTP requests made byurllibwill include the User-Agent header we specified. - Once everything is set up, we proceed with the actual file download using
urlretrieve(url, file_name). If the download is successful, the file will be saved locally with the providedfile_name. If any errors occur during the download, such as network connectivity issues or server errors, theurllib.error.URLErrorexception will be caught in theexceptblock. In this case, we print an appropriate error message indicating that the download has failed and display the specific error encountered. - Finally, if the file is successfully downloaded, we print “File downloaded successfully!” to the console, indicating that the process completed without any errors.
By importing the urllib.request module and using the urlretrieve() function, you can easily fetch files from the web and save them locally.
Always ensure that you have permission to download files from the provided URL and that you adhere to any terms of service or usage policies specified by the website.
Downloading a file from a URL using wget in Python
Another alternative to downloading and saving files using Python is to use the wget module.
To start downloading files with wget, you need to ensure that the wget module is installed on your system.
Here’s how to install it.
Open the Terminal, activate the virtual environment if you have one, and install wget using the pip command below:
pip install wgetNext, import wget into your Python code and download your file.
Once you have the wget module installed, you can start using it to download files from URLs.
To begin, import the module into your Python script:
import wgetNow, let’s proceed with downloading a sample PDF document file from a URL using the code below:
import wget
import urllib.request

url = "https://www.learningcontainer.com/wp-content/uploads/2019/09/sample-pdf-file.pdf"

try:
    opener = urllib.request.build_opener()
    opener.addheaders = [('User-Agent', 'Mozilla/5.0')]
    urllib.request.install_opener(opener)

    file_name = wget.download(url)
    print(f"File '{file_name}' downloaded successfully!")

except urllib.error.HTTPError as e:
    if e.code == 403:
        print("403 Forbidden Error: Access to the resource is denied.")
    else:
        print(f"Failed to download the file. Error: {e}")
except Exception as e:
    print(f"Failed to download the file. Error: {e}")
In this example, we assign the URL of the image file to the url variable and use wget.download(url) to initiate the download.
The download() function will fetch the file from the URL and save it in the current directory with its original file name.
Additionally, it returns the name of the downloaded file, which we store in the file_name variable.
We use a try–except block to handle any exceptions that might occur during the download process.
I have also used the
urllib.requestmodule to set a custom User-Agent header, simulating that the request is coming from Mozilla Firefox (User-Agent: Mozilla/5.0).This way, we address the possibility that the server is blocking access to the resource due to missing or invalid User-Agent information.
Additionally, we catch specific
urllib.error.HTTPErrorexceptions and check if the error code is 403.If we encounter a 403 Forbidden error, we print an informative message indicating that access to the resource is denied.
And that’s how you download files from a URL in your Python code.
How to save the file to the current directory in Python
To save your files in the current working directory, you just need to specify the file name for any of the libraries you are using.
So,
Using the urllib Library
To save a file to the current directory using urllib, you just need to specify the file name like this:
file_name = "sample-file.txt"

try:
    urllib.request.urlretrieve(url, file_name)
    print(f"File '{file_name}' downloaded and saved successfully to the current directory!")
except urllib.error.URLError as e:
    print(f"Failed to download the file. Error: {e}")
In this example, we use the urlretrieve() function from urllib.request to download the file from the specified url and save it as file_name in the current directory.
If the download is successful, the file will be saved in the same directory where your Python script is located.
If you want to save to a different location, specify the location inside the file_name global variable like this:
file_name = "path/to/file/sample-file.txt"

try:
    urllib.request.urlretrieve(url, file_name)
    print(f"File '{file_name}' downloaded and saved successfully to the current directory!")
except urllib.error.URLError as e:
    print(f"Failed to download the file. Error: {e}")
Using the requests Library
To save a file to the current directory using requests, you can do the following:
file_name = "sample-image.jpg"

try:
    response = requests.get(url)
    response.raise_for_status()  # Check for successful response

    with open(file_name, "wb") as file:
        file.write(response.content)
    print(f"File '{file_name}' downloaded and saved successfully to the current directory!")
In this example, we use the requests.get() function to retrieve the file from the url.
We then open a file in binary write mode (“wb”) and write the content of the response to the file.
The file will be saved in the current directory, where your Python script is located.
Using the wget Library
To save a file to the current directory using wget, you should do this:
import wget

url = "https://example.com/sample-data.csv"

try:
    file_name = wget.download(url)
    print(f"File '{file_name}' downloaded and saved successfully to the current directory!")

except Exception as e:
    print(f"Failed to download the file. Error: {e}")
In this example, we use the wget.download() function, which downloads the file from the specified url and saves it in the current directory.
The name of the downloaded file will be returned and stored in file_name.
By using the urllib, requests, or wget library, you can easily download files from URLs and store them locally.
Depending on your preference and project requirements, you can choose the library that best fits your needs.
Wrap up!
We covered various aspects of downloading files from URLs using different Python libraries that include urllib, requests, and wget libraries, each serving a specific purpose and offering unique functionalities for file retrieval tasks.
We learned how to download and save different types of files, including PDFs, audio files, image files, video files, and text files, to the current directory.
With this newfound knowledge, you can confidently incorporate file downloading capabilities into your Python projects, whether it’s for web scraping, data acquisition, or automation tasks
That’s it for this article!
Create, inspire, repeat!

![What does [:i] mean in Python? (Slice Notation in Python)](https://crackondev.com/wp-content/uploads/2023/07/Be-a-hero-and-slice-through-something-1024x812.png)